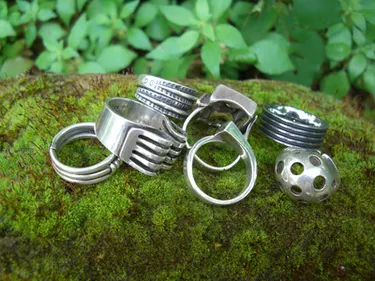
Metal casting is a project that anyone can do at home, if the right equipment is available. The "lost wax" casting method is the easiest. The process gets its name from the way wax melts away to make the mold. A wax replica of the finished ring or pendant heats until it burns out, leaving a molded impression behind used to cast a silver ring or pendant. Use caution when casting any metal, as you are working with very hot and very fast-moving equipment.
Step 1
Carve your piece out of wax, using the craft knife. Ring stock is a tubular piece of wax that jewelers use. Carve out the appropriate size first, then work on your design. This may take time, patience and several wax pieces to achieve the type of detail you are looking for. The wax piece made during this step must be the exact copy of the piece of silver jewelry that you intend as your finished product.
Video of the Day
Step 2
Use a wax pin -- a long, thin heated piece of wax -- to attach the mold to the sprue in the bottom of the rubber base. Fit the flask into the sprue base. The sprue is the thin channel that lets the wax exhaust and through which you'll pour the silver. Mix the investment, which is a plaster-like material, according to the package instructions and pour into the flask, covering the mold completely. Let it sit overnight to harden.
Step 3
Take off the base and fire the mold in a kiln. Do not use the oven, as there are toxic fumes created when heating. Heat the kiln gradually to 1,200 degrees Fahrenheit. The mold will disappear or "burn out" into the investment, leaving a perfect impression behind. Let the flask cool completely before going on to the next step.
Step 4
Prepare your centrifugal jewelry-casting machine according to instructions. Balance and wind it before beginning. Insert the cradle-shaped crucible. Use the welding torch to heat the crucible by placing it over the top with the flame inside the cradle. Prepare it with boric acid. A small amount of boric acid (about 1/2 tsp.) will make a glassy coating on the inside of the crucible to keep the silver clean and free of contaminants. Keep the torch flame inside the cradle.
Step 5
Add your silver pieces to the crucible. Test the silver before using to ensure it is free of contaminants such as plating. Add casting grain according to the instructions. Continue to heat the crucible. Do not put the flame directly on the silver. Instead, move the flame around the silver inside of the crucible. Direct flame will boil the silver, causing holes in the final product. Use a graphite stick to stir the silver if needed.
Step 6
Lock the flask in place and release the centrifuge. The liquid metal will now shoot from the crucible and into the flask to fill the mold. Allow the centrifuge to spin to a stop. Using heavy metal tongs, take the flask out of the centrifuge and into a bucket of water. Roll it around until the water stops bubbling and the flask is cooled.
Step 7
Take the white investment off the bottom of the cooled flask. Your silver piece of jewelry will be attached. It will also have the sprue attached. Use a small brush or old toothbrush and the bucket of water to thoroughly clean off the investment. Clip off the sprue with metal shears and polish.
Warning
Parts of this procedure create toxic fumes and some steps use flame and very high temperatures. Be sure you use appropriate safety equipment and study the appropriate safety procedures and follow them.
Things You'll Need
Craft knife
Wax mold
Metal flask with rubber sprue base
Investment (white powder)
Kiln
Centrifugal jewelry casting machine
Sterling Silver
Crucible
Welding torch
Boric acid
Casting grain
Graphite stick
Bucket of water
Metal tongs
Small brush or old tooth brush
Video of the Day